Getting Started
Install apiUi
Download the appropriate zip, unpack it somewhere and start apiUi.
Your first mock
Although you can send and receive free-format messages, the power of apiUi is in working with formal descriptions of messages. Here we will work with a swagger 2.0 definition but this might as well be OpenApi (f.k.a. Swagger) or a Wsdl.
- Introspect the service
- Choose
Project->Maintain list of WSLD and API files... - Copy this link and paste it in the 'Add...' form.
(It describes a simple 'contact' service. Be aware that there is no real implementation for this service on apiui.org, you will just mimic it) - Accept your choice and return to the main form (
OKfollowed byClose).
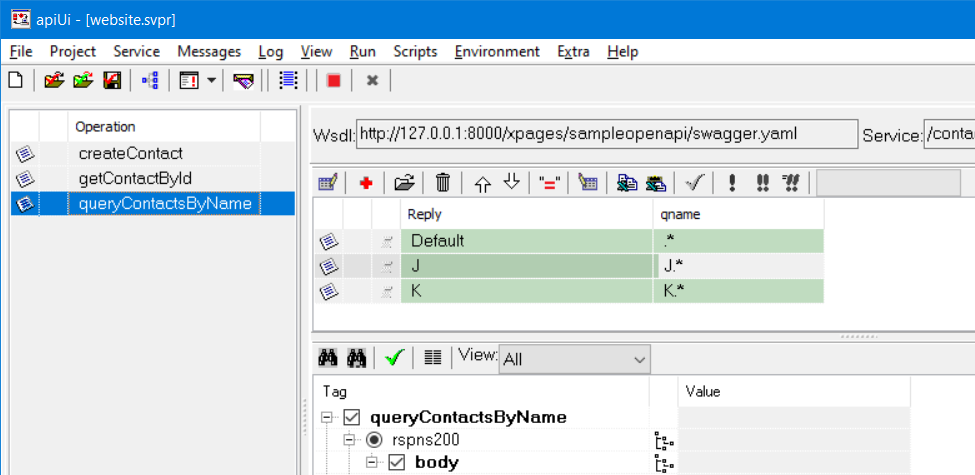
apiUi will now show a form with the operations for the 'contact' service.
- Choose
- Select the last operation in the operations panel at the left.
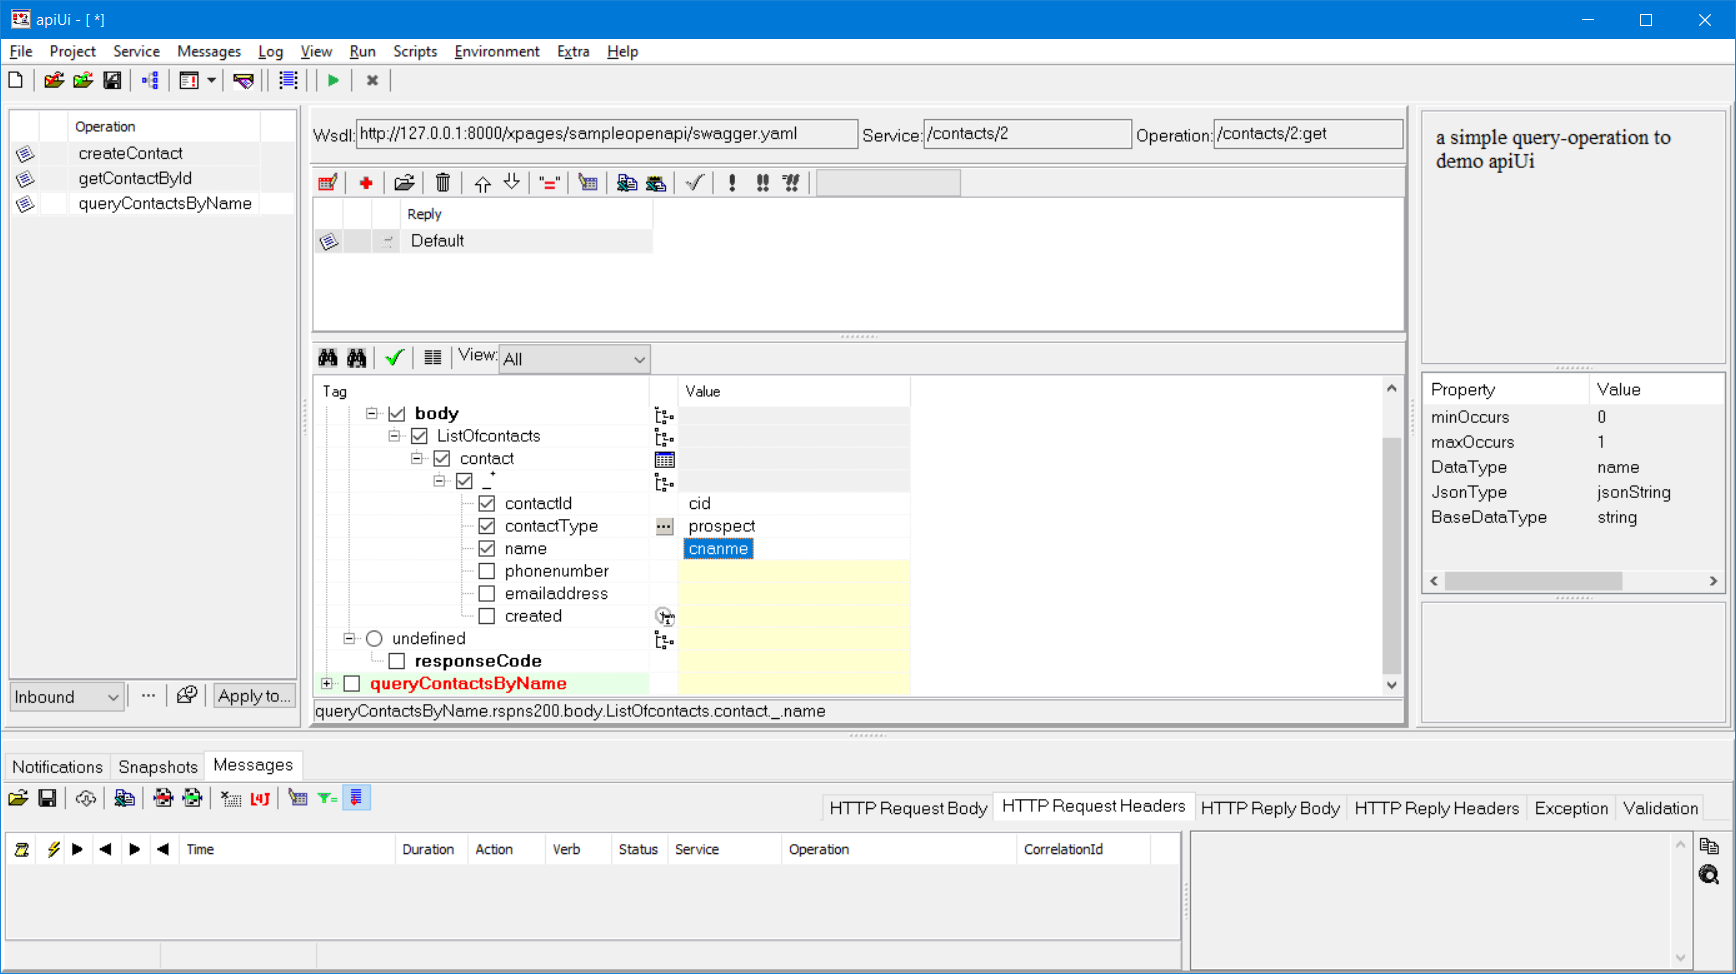
- Populate the default operation response
Features of the apiUi message editor are described in detail elsewhere. Some things good to know already are- The upper part of the screen is the design area, the lower part shows logging
- apiUi shows meta data for the focused element at the right side
- It makes no difference if a parameter is sent as header, as part of the path, as query parameter or in the body. apiUi places all parameter in the same structure.
- The apiUi editor has several helpers, depending on the datatype.
For instance, clicking on the button at contactType line will pop-up the possible values for that field.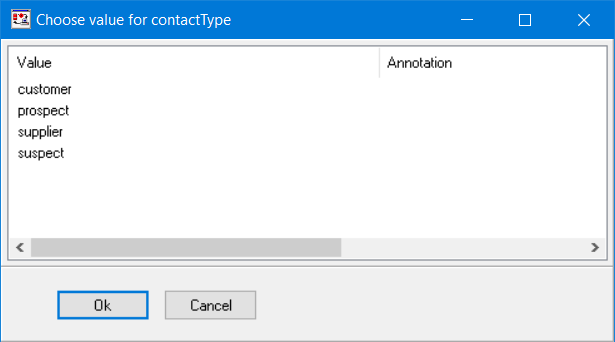
- An element is only part of the message in case the entire up-line of that element is checked (the check boxes just before the labels). When you enter or change data in an element, its up-line will automatically get checked
- You can see that an element is a repeating one by that little plus sign (in the figure just below contact). Add an occurrence by Right-clicking and choose 'Add occurrence' from the pop-up menu
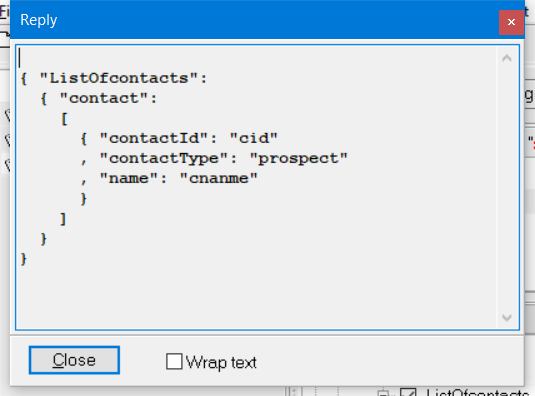
- Press Ctrl-T to preview the message as text which in this case will show
- Set the HTTP port number
- Choose
Extra->Options - Navigate to
Http->Portand enter 7777 as port number
- Choose
- Activate apiUi
- Choose
Run->Start (F9)
Congratulations!!!
You now have created a stub for the fictitious operation queryContactByName from the contacts service.
- Choose
- Save your work by choosing
File->Save Project as...- apiUi stores projects as a folder.
- Do not store any other data in this folder because that other data will get lost once the project is saved again.
- The name of the folder has a restriction, it must end with
.svpr.
Your first mock in action
Want to see your first mock in action?
- open another instance of apiUi
- Copy the same link and paste it as
API or WSDL - select the operation queryContactsByName again
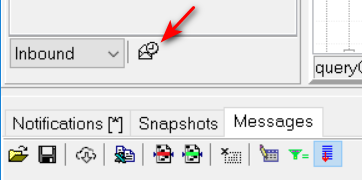
- just below the Operations list, switch from
InboundtoOutbound - The form is now showing the request. Type some data in the form
- Activate this instance
Run->Start (F9) - Send the request
Run->Send request (Ctrl-G) - Both instances of apiUi will now show a log line in the lower part of the screen,
In the one you opened last it is logged as Outbound, in the first as Inbound.
Select this log line and take a look at the data under the tabs at the right side, click on the little images at the left and right-click the selected log line to see more information.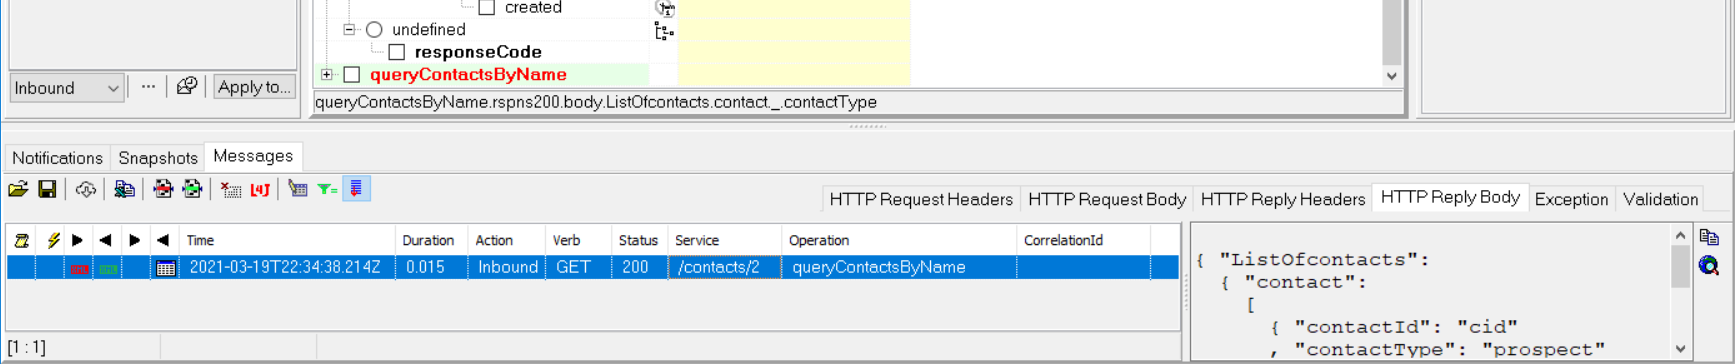
Different responses
To be able to test, you will have to be able to work with different responses. One way to achieve that is by correlating. When it receives a request, apiUi will choose a response based on the values of some request elements. These elements are called correlation elements.
To add a correlation element:
- From the menu choose
Messages->Select correlation elements...and clickAdd - In the Select element pop-up navigate to Req.querycontact2.qname and
to approve click
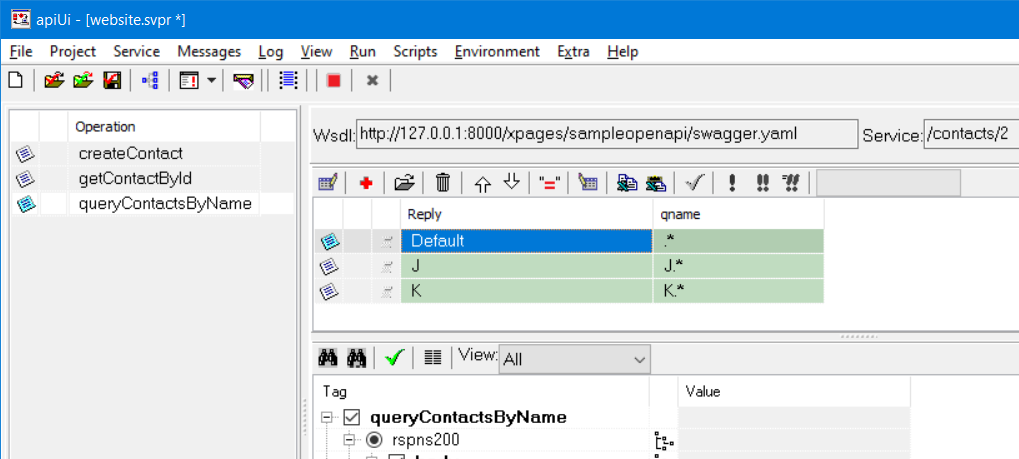
Oktwice. - Notice that an extra column appeared in the messages grid.
- Add a response by choosing
Messages->Addfrom the menu. - In this new column, you can enter a regular expression that apiUi will use to select which response to return.
When apiUi receives a message for this operation it will, starting from the second candidate, try if the denoted fields in the request match the expressions in the correlation columns. The first match it finds will be used as response.
If no match can be found, then the default (the first) response candidate is used. If for instance a request comes in with qname = 'Joost', then the second message will be returned. If filled with 'Thijs', then apiUi will use the first candidate since no other matches.
Dynamic responses
apiUi has a very powerful scripting language. With this feature it is very simple to use data from the request in the response, generate unique identifiers or timestamps or even lookup data from a database.
This example shows how easy it is to assign a request value to the response.
Rpy.getContactById.rspns200.body.contact.contactId := Req.getContactById.contactid;
Scripts can be at both operation and at message level. From the light blue images below you can tell that there is a script entered for both levels.
A red script button would indicate that the script has errors.
When a message comes in then apiUi will first do correlation, then execute the script on operation level and then the script on message level.
Having scripts on message level offers great flexibility but be aware of decreasing readability/maintainability of your project.
Find a detailed description here.
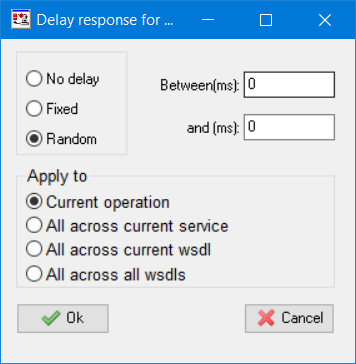
Bad performance
Want to simulate bad service performance?
Just click on the Set delay button and specify what you want to achieve. Depending on your requirements, you can apply this setting to other operations at the same time. Bad performance can also be achieved from script and of course also via the api of apiUi/apiUiServer.
Simulating faults
Simulating faults is as easy as simulating happy flows. Just assign data and you are done. In the example below an HTTP error 400 will be thrown. This 400 error has it's own structure because that is how it is defined in the schema. In case you want to throw an error that is not defined in the schema, assign a value to the undefined.responseCode.
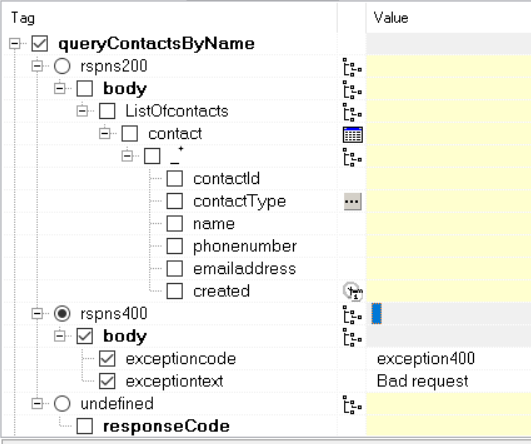
Of course you can also do these assignments from script.
if Req.queryContactsByName.qname = 'x502' then
  Rpy.queryContactsByName.undefined.responseCode := '502';